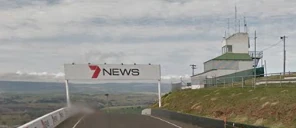
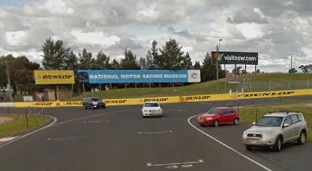
Mount Panorama is a real world racing circuit located near the township of Bathurst in New South Wales, Australia. It appears in Gran Turismo 6, Gran Turismo Sport and Gran Turismo 7.
The circuit is notable for 2 major races: the Bathurst 12 Hours and the ATCC/Australian Supercars Bathurst 1000. The Bathurst 1000 event is viewed as one of the most prestigious races in motorsport. The victors of the 161 lap race are crowned "King of the Mountain" and, since 2006, awarded the Peter Brock trophy, named after the ATCC driver who won the event 9 times.
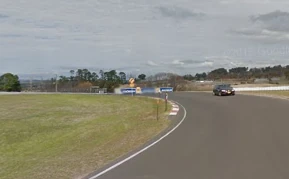
In Gran Turismo Sport, this track can be raced on at Dawn, Morning, Noon, Afternoon, Evening, Sunset or Night.
Events[]
Gran Turismo Sport[]
Driving School[]
- Lesson 25: What is understeer?
- Gold: 18.400
- Silver: 19.000
- Bronze: 19.700
GT League[]
- Clubman Cup; Race 9 - 3 laps
- World Hatchback Championship; Race 2 - 3 laps
- Gr.3 Endurance Series; Race 2 - 25 laps
Mission Challenge[]
- 5-7: Mount Panorama N600 race
- Race; Garage Car Event (N600)
Supercars of the world gather at Bathurst! Be wary of losing your balance in the high speed corners and descents at the midsection of this track.- Gold: 1st
- Silver: 2nd
- Bronze: 3rd
- Race; Garage Car Event (N600)
Gran Turismo 7[]
License Centre[]
- B-8: Cornering Basics 6
- Gold: 13.800
- Silver: 14.200
- Bronze: 15.300
World Circuits[]
- Japanese 4WD Challenge 600; - 2 Laps
- Asia-Oceania Championship; Race 3
- World GT Series Championship; Race 4
- American Clubman Cup 700; Race 6 - 5 laps
- World Touring Car 700; Race 8 - 7 laps
- GT Cup Gr.3; Race 4 - 10 laps
Missions[]
- The Sun Also Rises: Bathurst Gr.3 Battle
- Race; Jaguar F-type Gr.3
Challenge a long race on Mount Panorama. The mountainous road requires your 100% attention!- Gold: 1st
- Silver: 3rd
- Bronze: 5th
- Race; Jaguar F-type Gr.3
Layout & Sectors[]
NOTE: The sectors used in the Gran Turismo series are not accurate to those used in real life.
Sector 1[]
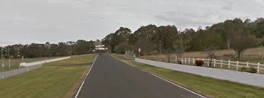
This is the section from the Mountain Straight, over 1 kilometer in length, to the entry point of the hill. For Hell's Corner, use the light pole on the right side as a cue for your braking point. Use the full width of the track to pick up exit speed. Maintain a straight line along Mountain Straight, as it undergoes several elevation changes and isn't completely smooth.
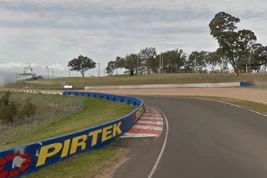
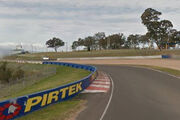
...and going up at the Mountain Straight.
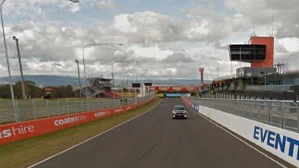
The Pit Straight...

Sector 2[]
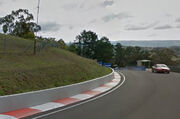
Once you have climbed up the straight, you will be facing Griffin's Bend, a right-and blind corner on an incline. Use the side road on the left as your cue or braking. If you overspeed into the corner it will be difficult to bring the car to the inside, and will lead to a large time loss. Get on the inside early and turn along the kerbstones. The kerbstones at the corner exit are quite tall, so be careful of hitting them and losing balance.
Following is a section with a steep ascent and many blind corners. An ascending left hand combined corner continues in turns 3 and 4. Time your turn-in using the gap on the right hand wall as your cue. Get on the outer side as you exit out. Turn 4 - The Cutting - is a corner that is banked on the inside. On the outside, the car can drift outward and hit the wall, so you need to reduce speed adequately and turn as tight as you can.
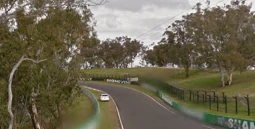
For turn 5, drive along the kerbtsones and accelerate out towards the marshal's post. At Quary Bend, set your apex where you go through the gate. For the exit from Reid Park, make sure to move quickly to the pouter side. From here, it will be a high-speed section with consecutive left corners combined with an uneven surface. Turn 7 has a small jumping spot, so make sure to drive on the center of the road.
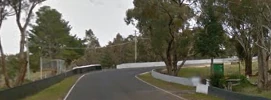
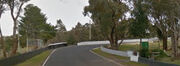
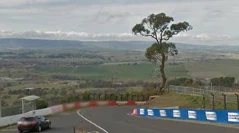
Continue on to Sulman Park, getting right up to The Grate on the outside wall as you accelerate out. McPhillamy Park brings you out to an open area on the hill. Be careful not to drive off the track on its exit. Let off the throttle before driving over the crest, and change the direction of your car before hitting the apex.
...Griffin's Mount,...
Griffin's Bend,...

...before going down from McPhillamy Park...

...and Reid Park all form the curves leading to the top of Mount Panorama...

...and onto Brock's Skyline.
Sector 3[]
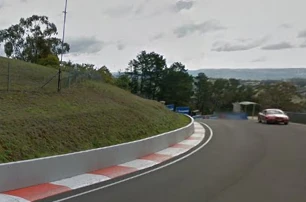
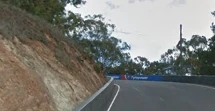
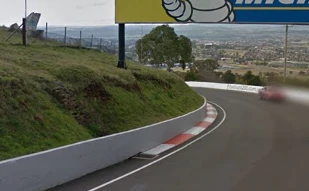
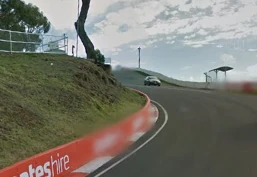
From here, the track begins a steep descent. With no escape zone and narrow track width, this is one of the most thrilling parts of the track. For Brock's Skyline, start braking from before the gate.
Turns 12 to 16 are known as The Esses, a complex sequence where your steering is hardly ever straight. For turns 12 and 13, reduce your speed and make sure to hit hit the apex. It is important to clear these corners in a straight line, without turning the car too much. Turns 14 and 15 form an S-bend that has a large drop. The car can be unstable here, so make sure to reduce speed adequately in the section before the corner, where the slope is still shallow. Stabilize the car with partial throttle as you go through.
Starting to brake for the apex of The Dipper, prepare for Forrest's Elbow, the final left hand turn at the end of the hill. Watch for overspeeding here, as you will be cornering off a steep descent. Set your apex far into the corner, and turn your car quickly towards the exit as you make your pass. This then leads onto Conrod Straight.

...before taking the slightly easier Forrest's Elbow...

The Esses of Mount Panorama, indicating the start of a tough break...


...to go down via the Conrod Straight.
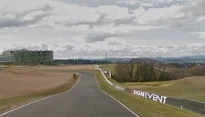
Sector 4[]
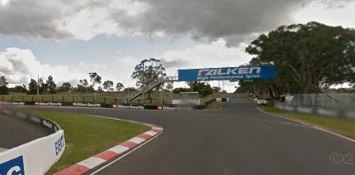
In this section, you will be jumping into a low speed chicane, after having reach top speed down Conrod Straight. There is a large change in inclination here, requiring high level braking techniques. For turn 19, approach from the outside edge, and come out on the middle line. The Chase is a blind chicane that turns left-right on an upward climb. It is difficult to determine where to start braking here, which can cause cars to go off track. Use the patterns on the walls and the trees in the area as cues to find your braking point.
Avoid the tall kerbstones for the sharp 20, and clear turn 21 flat out. For the final Murray's Corner, gauge your braking point with the zebra zone at the fork of the pit entrance. The surface is uneven her and can make your car jump and lose traction, so make sure to be careful on the throttle.

...Murray's Corner and the Pit Straight

The entrance to the Chase, a long chicane-like corner among the Conrod Straight...

Replay Demo[]

Hidden Gem Trophy[]
Hidden Gem is a PSN trophy for Gran Turismo 6 which must be unlocked at this circuit. Adjacent to the final corner (Murray's Corner) is an access road (Panorama Avenue) which can be driven onto. Behind the first barrier on this road lies a single stack of blue tires. Knocking over these tires awards the trophy. These tires do not appear in Gran Turismo Sport.
Easter Eggs[]
If you wait around 9-10 minutes (GT7) at turns 8-9, a UFO can be seen , and may occasionally abduct cows surrounding the area.
Trivia[]
- Due to the narrow, unique starting grid layout, in Sport Mode Championship races set to use grid start, the pre-race grid walk will go in 2-1-3-4 order, instead of 1-2-3-4 order used in other tracks.